Page Editor
Page Listing
System > Site Design > Learning Portal |or| Public Website > Page Editor
Selecting the Page Editor tile brings up a Page Listing for the selected Page Group. Each Page in the listing has a number to its left, a Title, and several icons to its right to Edit, Copy, and Delete.
By overwriting the numbers to a Page's left, you can re-sequence the order your Pages appear in; this will also extend to their display order in user-facing navigation.
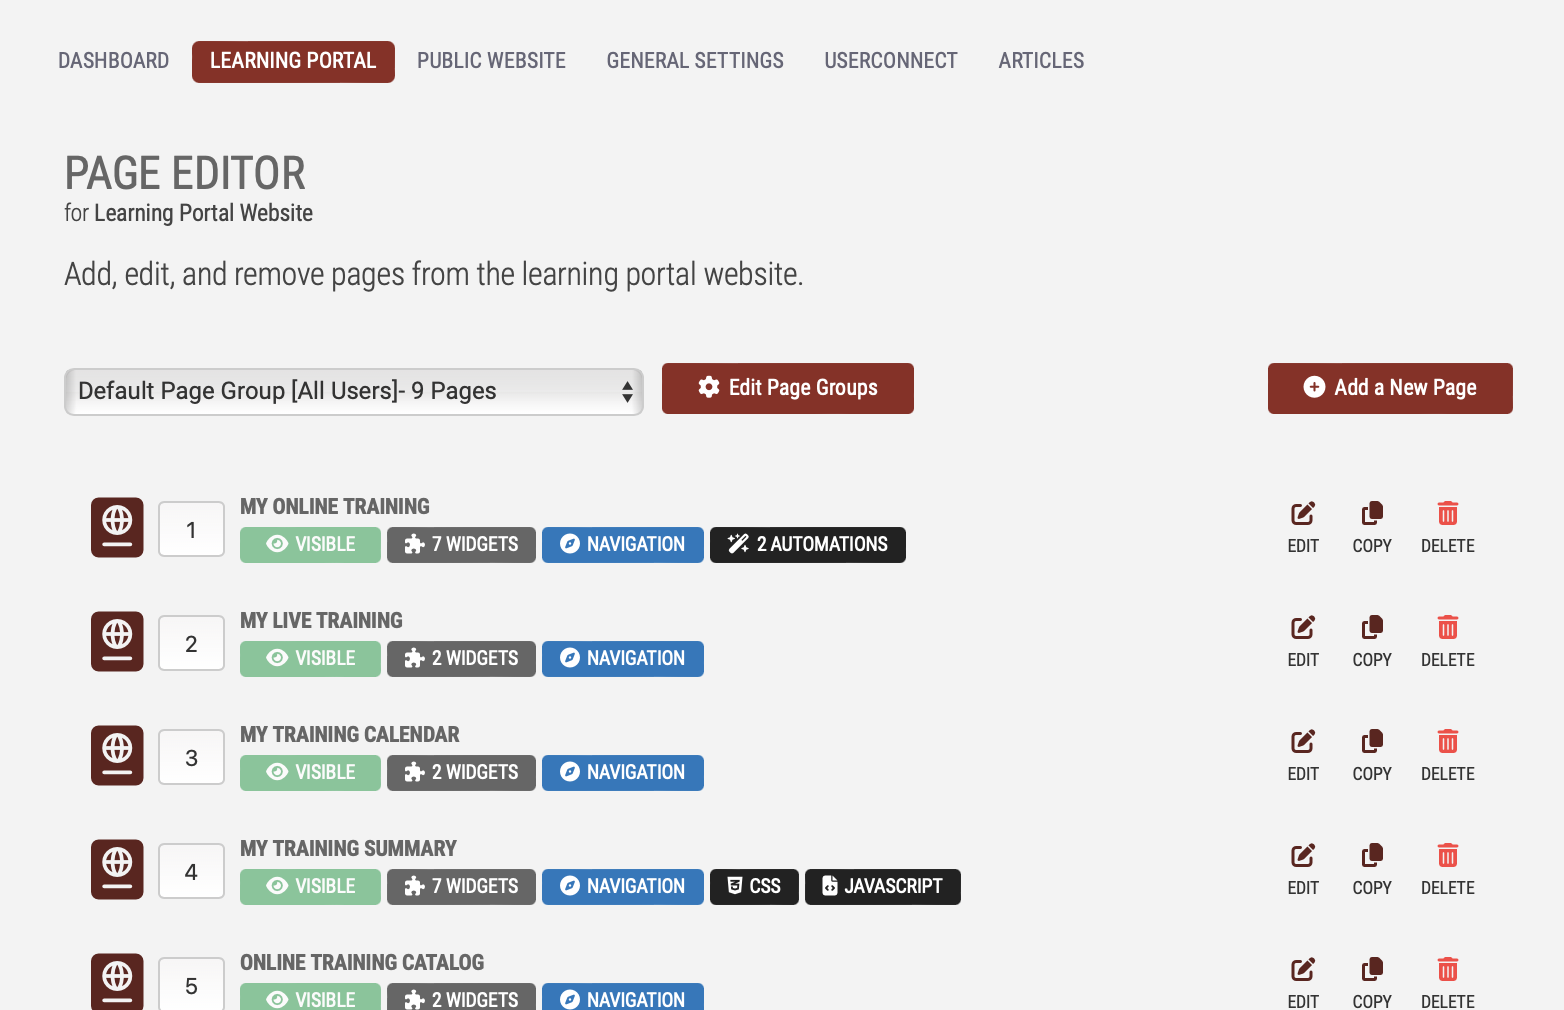
On the top left of the Page Listing, you will see a dropdown, which by default includes "Default Page Group" in its name. Selecting the dropdown allows you to select another Page Group to work in, and the Page Listing will update to reflect the contents of the selected Page Group.
On the top right of the Page Listing, you'll see a button to Add a New Page. Selecting this button prompts you for a title and a template to select from, before adding a new Page to the Page Group currently in focus. You can also create a new Page by selecting the Copy button for an existing Page, which will prompt you to name the new Page before creating the copy.
Selecting the Delete button associated with a Page will ask for a confirmation before successfully deleting.
Page Editor
System > Site Design > Learning Portal |or| Public Website > Page Editor > Edit
Selecting the Edit button associated with a Page will take you into the Page Editor. This page is divided into two broad sections: the Settings, and the Content.

Selecting the gear icon next to your Page's title will toggle the expanse of a comprehensive settings menu for this Page. From here, you can update the Page's Title and Metadata; as well as change the Page Group it appears in, its visibility in navigation, and its Sequence.
Metadata (Page Title, Description and Keywords) can be set up for pages on the Public Website. These are useful for optimizing your pages for SEO and search engine listings.
Beneath the Page's settings you will find Page's Content Builder. This is a "Widget" based builder, where many of the Widgets have their own settings, and can be resized to better fit the cantor of your Website.
New Widgets can be added to your Page's Content Builder by selecting the Add Widget button. After a Widget has been added, it will be represented with a colored border on the Content Builder. The Widget's name will appear along the border's header, and its contents will display a short summary of what it does, and have a gear icon towards the bottom right of its border. Clicking the gear will open up the settings for this Widget.
After a change has been made to the Page Editor, the Save Changes button will become emphasized - if you're happy with your changes, be sure to Save Changes before leaving.