Public Website Widgets
In this section we will discuss the various widgets you can use on the Public Website.
Articles
There are 2 widgets here, the Article widget, and the Article Listing widget.
Article Widget
This widget is straightforward. Simply pick the article you want to appear in the widget.
Article Listing Widget
This widget renders a list of articles a user can pick from.
You can choose which category of articles should appear in the list, how many should appear, and whether you want just the title of each article to appear, or, the title, date and a portion of the body text.
If you place an Article Listing widget on a page, and you also have an Article widget on the same page, the Article widget will be the target viewport for the articles the user clicks on in this Article Listing. If you do not have an Article widget on the page, then the user will be taken to a new page with just the article on it.
Calendar
The Calendar widgets are Daily Calendar and Monthly Calendar. Both can be sized, and both are viewports to calendar events for the user — but the actual interaction with the events occurs on the actual calendar, which is a new window once the user clicks on an area of the Calendar widget.Course Listing
There are 2 widgets here for Course Listings:
Course Enrollment —this displays a catalog of courses which visitors can enroll themselves into.
Training For Sale — this widget lists products that can be purchased by the visitor. This includes online courses, live classes, and other products.
Settings include the ability to define which kind of products should be shown (courses, other products, live classes, or any combination of these) and which category to show (each widget can display a single category).
Icon Buttons
Each Icon Button widget allows you to set up the actual icon to use for the button, and apply the caption (or no caption), and if applying a caption, where it should appear (along the bottom, or to the right of the icon - in which case, the button itself will render wider).
Unlike most widgets, these do not have width/height settings — they are a fixed size (either 1x1, or 1x2 depending on where caption is configured to show up).
NOTE: All icon buttons in mobile mode will display with the icon to left, and the caption to the right.Here are the icon buttons you can add to this site:
Back Button — This button navigates the user back one page
Cart Button — this button navigates the visitor to their shopping cart (where they can ultimately check out).
Home Page Button — This takes the visitor to the Home Page of this site.
Login Button — this button navigates the visitor to the account login page (Learning Portal Login page).
Next Button — this button navigates the user forward one page
Online Store Button — this button navigates the visitor to the storefront.
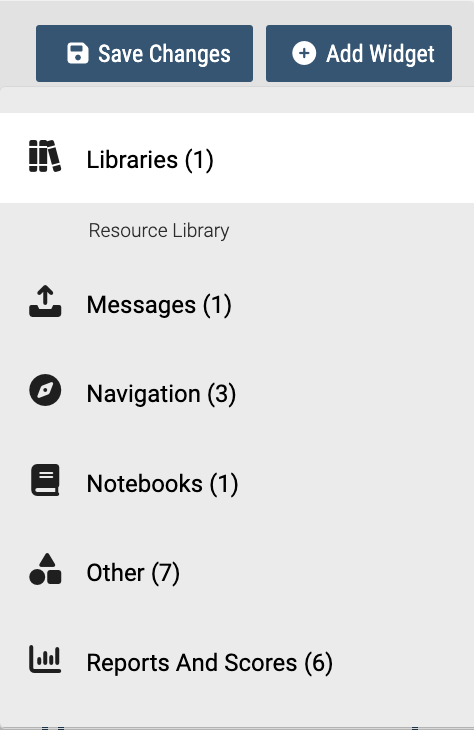
Libraries
The library widgets allow you to display lists of resources to your visitors.
You can build libraries in the File Manager in the /_other/libraries/ folder (each folder beneath that one is essentially a library you can use).
You place files in the folders to use, naming them the way you want them to appear in the list (for example, a video file named “important_things_about_safety.mp4” would be listed as “Important Things About Safety”).
To assign a specific icon to the item in the list (as opposed to using the default icon), you can add a .png file of the same name (so, ‘safety101.png’ would be used as the icon for a video named ‘safety101.mp4’).
If you want a description to appear, you can also add a text file of the same name, with the description inside the file. For example, the contents of ‘safety101.txt’ would be used as the description for a video named ‘safety101.mp4’.
Each widget has settings to show the listing as tiles or as a list, and whether or not to display a search bar to filter the displayed results.
NOTE: On mobile, if using tiles, the widget will have an auto-height to show a single row of tiles that will scroll left to right.
Here are the libraries you can add to this site:
Resource Library — this will list multiple resource types in a single view (you can select which kinds of resources — audio, documents, and/or videos). Note that if this contains audio resources, only one can exist on a page.
Navigation
For this site (and the others as well), you can add a navigation side-bar (left or right), navigation tab strip, a navigation bar or slide-in navigation.
As a general rule, stick with the side-bar navigation, which includes slide-in navigation, as well as access to the userconnect area, and lends to a cleaner look and feel for the user. Otherwise, if the navigation widget is going to list a lot of pages, you should use the navigation bar or slide-in navigation as opposed to the tab strip - since the navigation bar and slide-in navigation can display more pages as you can adjust the height accordingly (the tab strip runs out of space, and pages do not get shown).
Recommendation - if you are designing with mobile viewing in mind, do not use the tab-strip navigation.
Besides the side-bar navigation which has no settings, the settings for each navigation widget are the same.
Color — this is the color/theme for the widget. There are a number of selections that you can pick from, and also a custom option that allows you to create the exact CSS so you can match it up with your exact desired branding if needed.
Page Group — The Auto option (which is the default) will show pages in the page group of the current page. For example, if the page resides in Page Group 10, then all pages in Page Group 10 will be shown (if you move your pages around into different page groups, this option is a good one since the navigation widget is ‘smart’).
The All Pages option means all pages the user has access to will be shown - across all page groups. If you have a complex site with lots of pages, this may not be a good option to use since the list of menu items can be quite large.
The remaining options (Default Page Group, and Page Group 1 though 99) will show pages specific to that Page Group.
Other
This category of widgets contains various widgets that do not fit into their own category, but are quite useful nonetheless.
Embedded Web Page — use this option to embed a webpage from another website into the page.
Line — add a line to the page (several configurations enable you to set up the visual aspects of the line).
New User Sign-up — add a sign-up form to the site. You have several settings here that are quite useful.
- you can set up the # days a user will be active when signing up here
- you can assign them to a specific user group when signing up here
- you can assign them to a specific organization/branch when signing up here
- you can assign a default language the user will be linked to (localizing their content) when signing up here
- you can require the user to enter a key code (linked to a course) to complete the sign-up
Using multiple sign-up forms on multiple pages, you can create a predictable and user-friendly flow. For example, you may have a page set up that lets a visitor pick their default language, and when they select the language, it navigates them to the page with the sign-up form that will set their language to be that language once they sign up. You might also use the account duration to allow free account sign-ups for a limited time.
Page CSS — use this to add CSS to the page. The actual widget will not appear to the user.
Page Javascript — use this to add Javascript code to the page. The actual widget will not appear to the user.
Text Passage — use this to add textual content (including images) to the page.
Whitespace — use this to add whitespace. This can be quite useful if you are trying to create widget layouts to force widgets ‘down’ instead of having them float to the top — you can add whitespace widgets as placeholders.
Video
This category contains several widgets enabling you to add video’s to this site.
Amazon S3 — add a video hosted on Amazon S3.
Other — add a video hosted on any other website (often they will provide you with an embed code for the video, which gets pasted here).
Uploaded Video — add a video you have uploaded into your LMS system.
Youtube Video — add a YouTube video.
In this section we will discuss the various widgets you can use on the Public Website.
Articles
There are 2 widgets here, the Article widget, and the Article Listing widget.
Article Widget
This widget is straightforward. Simply pick the article you want to appear in the widget.
Article Listing Widget
This widget renders a list of articles a user can pick from.
You can choose which category of articles should appear in the list, how many should appear, and whether you want just the title of each article to appear, or, the title, date and a portion of the body text.
If you place an Article Listing widget on a page, and you also have an Article widget on the same page, the Article widget will be the target viewport for the articles the user clicks on in this Article Listing. If you do not have an Article widget on the page, then the user will be taken to a new page with just the article on it.
Calendar
The Calendar widgets are Daily Calendar and Monthly Calendar. Both can be sized, and both are viewports to calendar events for the user — but the actual interaction with the events occurs on the actual calendar, which is a new window once the user clicks on an area of the Calendar widget.Course Listing
There are 2 widgets here for Course Listings:
Course Enrollment —this displays a catalog of courses which visitors can enroll themselves into.
Training For Sale — this widget lists products that can be purchased by the visitor. This includes online courses, live classes, and other products.
Settings include the ability to define which kind of products should be shown (courses, other products, live classes, or any combination of these) and which category to show (each widget can display a single category).
Icon Buttons
Each Icon Button widget allows you to set up the actual icon to use for the button, and apply the caption (or no caption), and if applying a caption, where it should appear (along the bottom, or to the right of the icon - in which case, the button itself will render wider).
Unlike most widgets, these do not have width/height settings — they are a fixed size (either 1x1, or 1x2 depending on where caption is configured to show up).
NOTE: All icon buttons in mobile mode will display with the icon to left, and the caption to the right.Here are the icon buttons you can add to this site:
Back Button — This button navigates the user back one page
Cart Button — this button navigates the visitor to their shopping cart (where they can ultimately check out).
Home Page Button — This takes the visitor to the Home Page of this site.
Login Button — this button navigates the visitor to the account login page (Learning Portal Login page).
Next Button — this button navigates the user forward one page
Online Store Button — this button navigates the visitor to the storefront.
Libraries
The library widgets allow you to display lists of resources to your visitors.
You can build libraries in the File Manager in the /_other/libraries/ folder (each folder beneath that one is essentially a library you can use).
You place files in the folders to use, naming them the way you want them to appear in the list (for example, a video file named “important_things_about_safety.mp4” would be listed as “Important Things About Safety”).
To assign a specific icon to the item in the list (as opposed to using the default icon), you can add a .png file of the same name (so, ‘safety101.png’ would be used as the icon for a video named ‘safety101.mp4’).
If you want a description to appear, you can also add a text file of the same name, with the description inside the file. For example, the contents of ‘safety101.txt’ would be used as the description for a video named ‘safety101.mp4’.
Each widget has settings to show the listing as tiles or as a list, and whether or not to display a search bar to filter the displayed results.
NOTE: On mobile, if using tiles, the widget will have an auto-height to show a single row of tiles that will scroll left to right.
Here are the libraries you can add to this site:
Resource Library — this will list multiple resource types in a single view (you can select which kinds of resources — audio, documents, and/or videos). Note that if this contains audio resources, only one can exist on a page.
Navigation
For this site (and the others as well), you can add a navigation side-bar (left or right), navigation tab strip, a navigation bar or slide-in navigation.
As a general rule, stick with the side-bar navigation, which includes slide-in navigation, as well as access to the userconnect area, and lends to a cleaner look and feel for the user. Otherwise, if the navigation widget is going to list a lot of pages, you should use the navigation bar or slide-in navigation as opposed to the tab strip - since the navigation bar and slide-in navigation can display more pages as you can adjust the height accordingly (the tab strip runs out of space, and pages do not get shown).
Recommendation - if you are designing with mobile viewing in mind, do not use the tab-strip navigation.
Besides the side-bar navigation which has no settings, the settings for each navigation widget are the same.
Color — this is the color/theme for the widget. There are a number of selections that you can pick from, and also a custom option that allows you to create the exact CSS so you can match it up with your exact desired branding if needed.
Page Group — The Auto option (which is the default) will show pages in the page group of the current page. For example, if the page resides in Page Group 10, then all pages in Page Group 10 will be shown (if you move your pages around into different page groups, this option is a good one since the navigation widget is ‘smart’).
The All Pages option means all pages the user has access to will be shown - across all page groups. If you have a complex site with lots of pages, this may not be a good option to use since the list of menu items can be quite large.
The remaining options (Default Page Group, and Page Group 1 though 99) will show pages specific to that Page Group.
Other
This category of widgets contains various widgets that do not fit into their own category, but are quite useful nonetheless.
Embedded Web Page — use this option to embed a webpage from another website into the page.
Line — add a line to the page (several configurations enable you to set up the visual aspects of the line).
New User Sign-up — add a sign-up form to the site. You have several settings here that are quite useful.
- you can set up the # days a user will be active when signing up here
- you can assign them to a specific user group when signing up here
- you can assign them to a specific organization/branch when signing up here
- you can assign a default language the user will be linked to (localizing their content) when signing up here
- you can require the user to enter a key code (linked to a course) to complete the sign-up
Using multiple sign-up forms on multiple pages, you can create a predictable and user-friendly flow. For example, you may have a page set up that lets a visitor pick their default language, and when they select the language, it navigates them to the page with the sign-up form that will set their language to be that language once they sign up. You might also use the account duration to allow free account sign-ups for a limited time.
Page CSS — use this to add CSS to the page. The actual widget will not appear to the user.
Page Javascript — use this to add Javascript code to the page. The actual widget will not appear to the user.
Text Passage — use this to add textual content (including images) to the page.
Whitespace — use this to add whitespace. This can be quite useful if you are trying to create widget layouts to force widgets ‘down’ instead of having them float to the top — you can add whitespace widgets as placeholders.
Video
This category contains several widgets enabling you to add video’s to this site.
Amazon S3 — add a video hosted on Amazon S3.
Other — add a video hosted on any other website (often they will provide you with an embed code for the video, which gets pasted here).
Uploaded Video — add a video you have uploaded into your LMS system.
Youtube Video — add a YouTube video.