Completion & Certificate
Learning > Instructor Led Training > Training Programs > Manage > Program Certificate
Opening the Program's Completion & Certificate settings provides the tools to modify the completion requirements, opt whether or not this Program should provide a Certificate, and modify that Certificate.
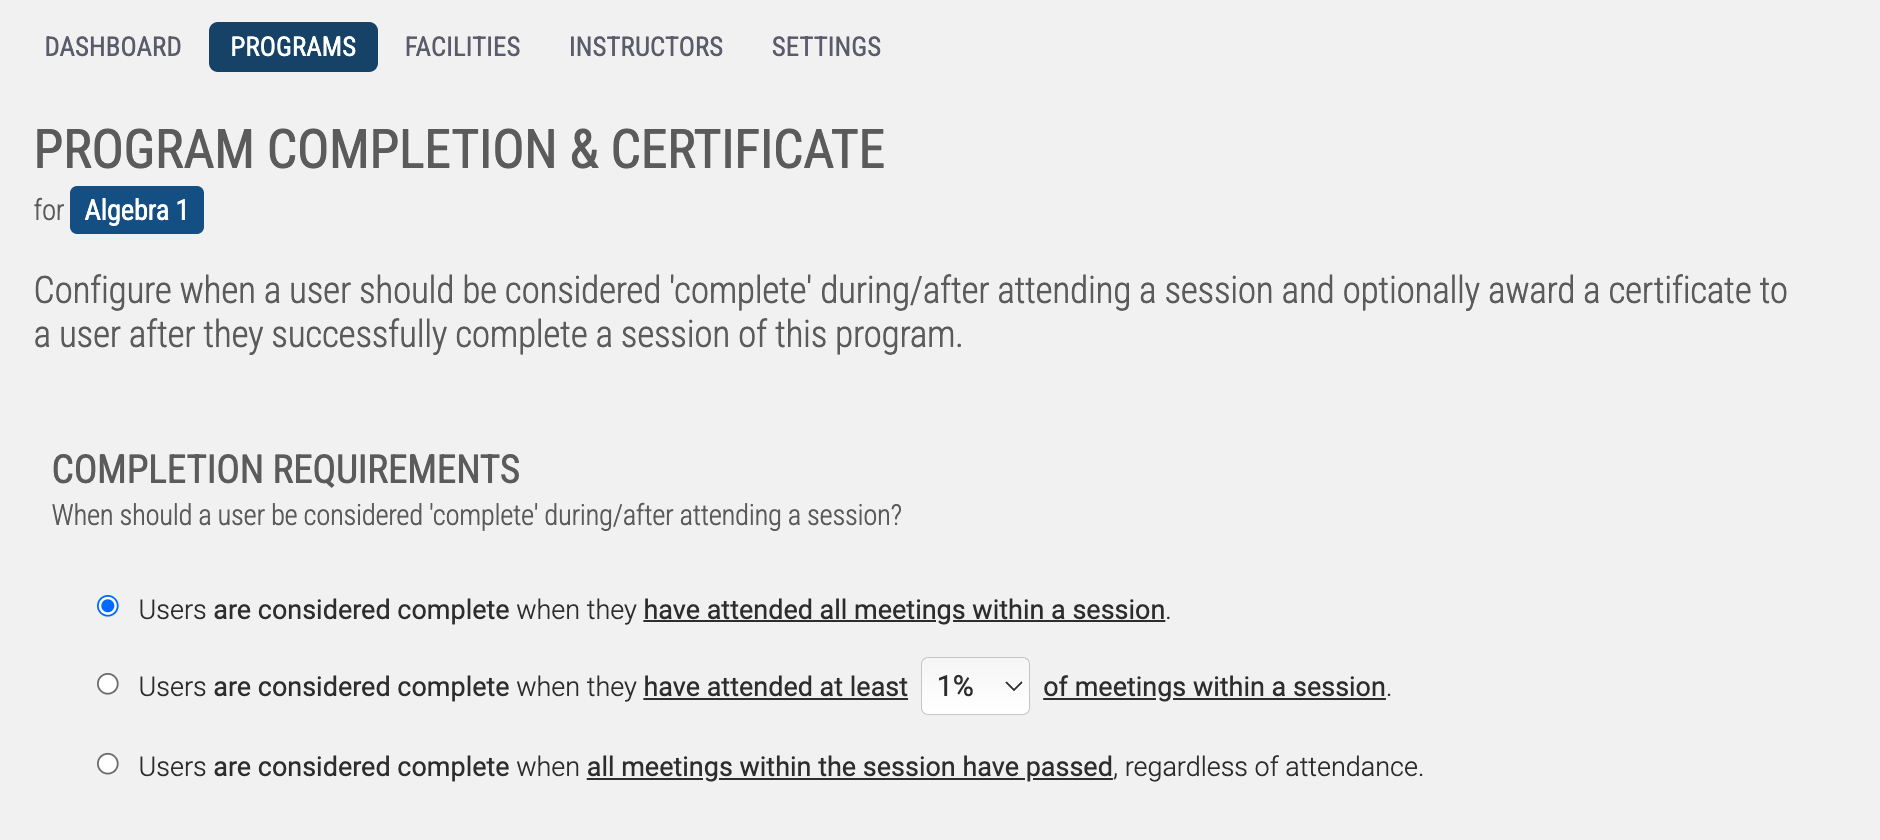
Completion Requirements
The Program's Completion Requirements pivot around a User's Attendance to their enrolled Session; check out the Enrollment & Attendance section for more details. Completion is recognized based on the setting you toggle; either requiring 100% attendance, a select percentage of attendance, or just waiting for the Session to conclude.
A user's ILT Program Completion is checked against for purposes of awarding the ILT Certificate; but it can also be used for Learning Path Step Completion, and Certification Program renewal/awarding.
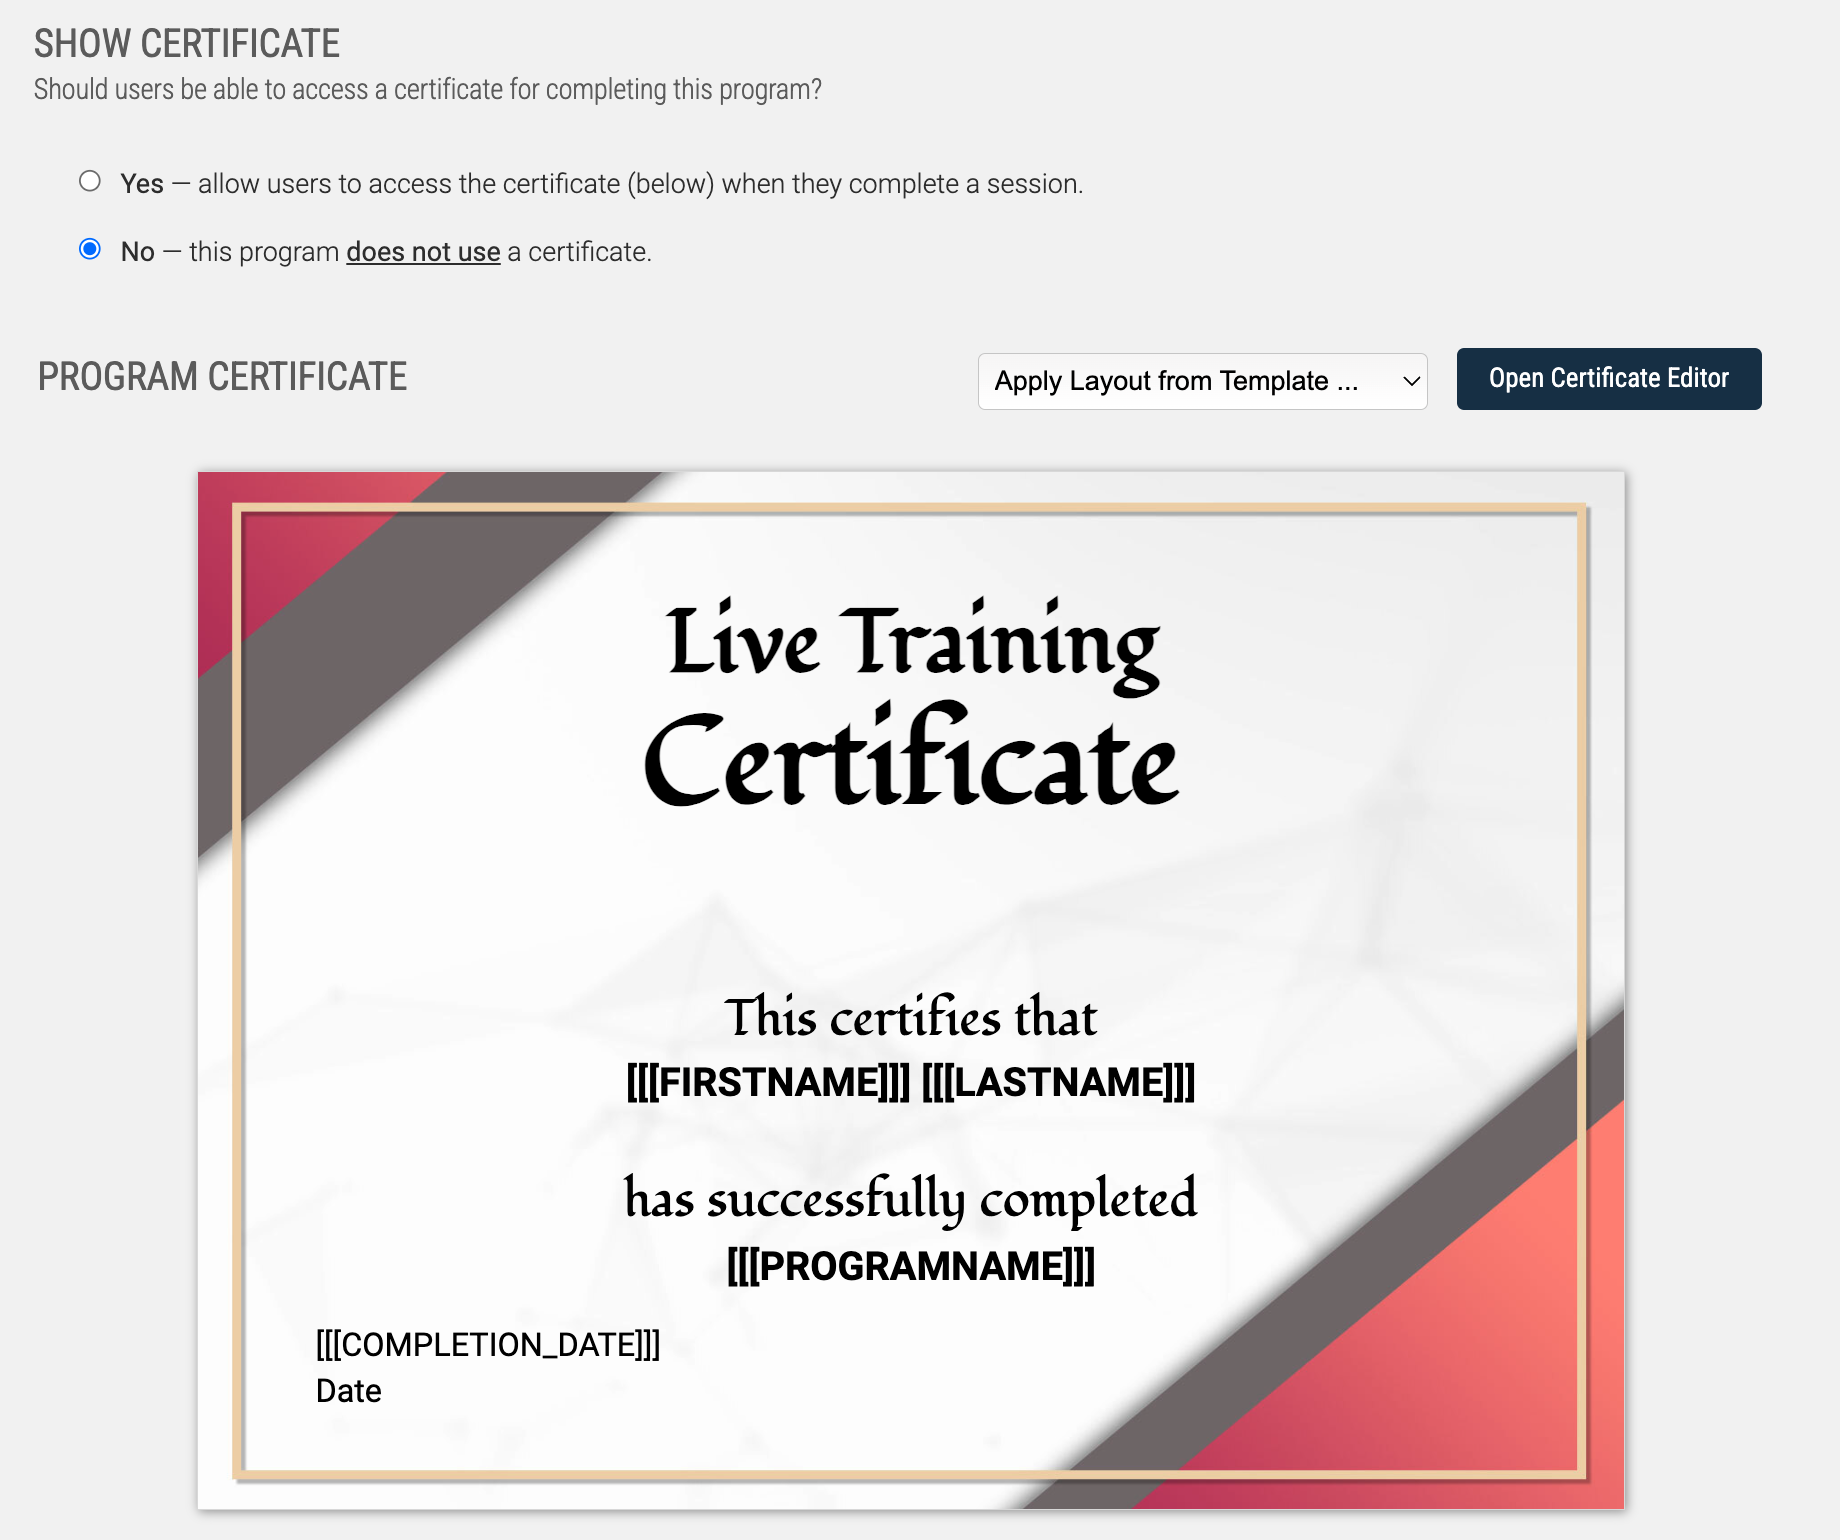
Program Certificate
After selecting whether or not this Program should award a printable Certificate, you'll have the opportunity to customize the awarded Certificate. Adjacent to the Certificate Editor, you'll find the ability to quickly apply any certificate themes you've created and saved in the past. Or, opening the Certificate Editor will bring up a certificate design canvas to start customizing. All of the tools for making changes are on the right side panel. This is the same certificate editing canvas used for other kinds of certificates in Axis LMS.
Opening the Editor, you will have access to the following options:
These items are found along the top left side-bar.
Add Text — Add a text region to the certificate. This can be static text, or a placeholder for data. Once added, text properties can be modified, and the text block can be moved. See more details below.
Add Image — Add an image to the certificate. Once added, images can be moved and resized. While resizing, hold down your Shift key to maintain the image's aspect ratio. See more details below.
Background — Sometimes referred to as the "Border Image", this acts as the background image. Select this option to change your background image. You can use just a border, or an entire graphic that is your entire certificate content minus the data fields. See more details below.
Select Object — Bring up a full list of the different selectable objects that exist on your Certificate; this option is especially useful if objects are layered in such a way that you cannot select a layer that is behind another.
Hot Keys — Click to view some niche, but useful commands you can use via keyboard shortcuts - these enable more precise tweaking of items, and such as allowing access to modify the css for different elements.
These items are found along the bottom left side-bar.
Load from Template — Load in a certificate layout from a previously saved template and use as your starting point for this certificate. Note that only Instructor Led Program Certificate Templates can be loaded in.
Save As Template — If the layout you have created is what you would like to use in the future for other ILT Programs, you can save the layout as a template.
These items are found along the top right of the header.
Grid Size — This enables you to set the grid size for elements on the certificate, which is used when you reposition/move elements, and also when you resize them.
Save & Close — This option enables you to save the changes you have made to the certificate layout.
Detailed Element Breakdown
While some of the options above are simple enough to understand, a few warrant further expansion on what is possible.
Text Element
When you add a text element, or, click on an existing element on the certificate, a detailed configuration panel will appear. Through this panel, you can adjust things such as the font family; style; font-size; letter spacing; and more. Also, if there is something not available here, you can use the keyboard command [CTRL][SHIFT]~ to edit the CSS of the item.
Also note that once you have selected a text element, you can reposition/move it, and also resize it using the resize handle at the bottom right of the text block. The movement and resizing scale will use the aforementioned Grid Size setting.
Image Element
When you add an image element, or, click on an existing image on the certificate, the image element panel will expand.
Using this panel, you can edit things about the image, such as its the border radius; shadow, rotation, and its position on the X-axis (allowing you to prioritize the layer / bring it closer to the 'top' of the layers). Also, if there is something not available here, you can use the keyboard command [CTRL][SHIFT]~ to edit the CSS of the item.
When you click on an image element, you can reposition/move it, and also resize it using the resize handle at the bottom right of the text block. The movement and resizing scale will use the aforementioned Grid Size setting. By holding down the Shift key during resize, the aspect ratio of the image will be preserved. If you have added the image for a user (which is the placeholder for a user’s actual avatar), resizing the image will always maintain the aspect ratio.
There are a handful of images available to add to your certificate, but you can add in your own images to select from by uploading images into your files area. Go to System > Files > File Manager, then browse to the /_images/cert_images/ folder. Any images you upload here will be available to choose from the certificate editor.
Change Background Image
You can change the border image by clicking the Background button. This will bring up a screen where you can choose the border/background you would like to use on your Certificate.
There are a handful of images already prepared to add to your certificate, but you can add in your own images to select from by uploading images into your files area. Go to System > Files > File Manager, then browse to the /_images/cert_borders/ folder. Any images you upload here will be available to choose from the certificate editor.
Learning > Instructor Led Training > Training Programs > Manage > Program Certificate
Opening the Program's Completion & Certificate settings provides the tools to modify the completion requirements, opt whether or not this Program should provide a Certificate, and modify that Certificate.
Completion Requirements
The Program's Completion Requirements pivot around a User's Attendance to their enrolled Session; check out the Enrollment & Attendance section for more details. Completion is recognized based on the setting you toggle; either requiring 100% attendance, a select percentage of attendance, or just waiting for the Session to conclude.
A user's ILT Program Completion is checked against for purposes of awarding the ILT Certificate; but it can also be used for Learning Path Step Completion, and Certification Program renewal/awarding.
Program Certificate
After selecting whether or not this Program should award a printable Certificate, you'll have the opportunity to customize the awarded Certificate. Adjacent to the Certificate Editor, you'll find the ability to quickly apply any certificate themes you've created and saved in the past. Or, opening the Certificate Editor will bring up a certificate design canvas to start customizing. All of the tools for making changes are on the right side panel. This is the same certificate editing canvas used for other kinds of certificates in Axis LMS.
Opening the Editor, you will have access to the following options:
These items are found along the top left side-bar.
Add Text — Add a text region to the certificate. This can be static text, or a placeholder for data. Once added, text properties can be modified, and the text block can be moved. See more details below.
Add Image — Add an image to the certificate. Once added, images can be moved and resized. While resizing, hold down your Shift key to maintain the image's aspect ratio. See more details below.
Background — Sometimes referred to as the "Border Image", this acts as the background image. Select this option to change your background image. You can use just a border, or an entire graphic that is your entire certificate content minus the data fields. See more details below.
Select Object — Bring up a full list of the different selectable objects that exist on your Certificate; this option is especially useful if objects are layered in such a way that you cannot select a layer that is behind another.
Hot Keys — Click to view some niche, but useful commands you can use via keyboard shortcuts - these enable more precise tweaking of items, and such as allowing access to modify the css for different elements.
These items are found along the bottom left side-bar.
Load from Template — Load in a certificate layout from a previously saved template and use as your starting point for this certificate. Note that only Instructor Led Program Certificate Templates can be loaded in.
Save As Template — If the layout you have created is what you would like to use in the future for other ILT Programs, you can save the layout as a template.
These items are found along the top right of the header.
Grid Size — This enables you to set the grid size for elements on the certificate, which is used when you reposition/move elements, and also when you resize them.
Save & Close — This option enables you to save the changes you have made to the certificate layout.
Detailed Element Breakdown
While some of the options above are simple enough to understand, a few warrant further expansion on what is possible.
Text Element
When you add a text element, or, click on an existing element on the certificate, a detailed configuration panel will appear. Through this panel, you can adjust things such as the font family; style; font-size; letter spacing; and more. Also, if there is something not available here, you can use the keyboard command [CTRL][SHIFT]~ to edit the CSS of the item.
Also note that once you have selected a text element, you can reposition/move it, and also resize it using the resize handle at the bottom right of the text block. The movement and resizing scale will use the aforementioned Grid Size setting.
Image Element
When you add an image element, or, click on an existing image on the certificate, the image element panel will expand.
Using this panel, you can edit things about the image, such as its the border radius; shadow, rotation, and its position on the X-axis (allowing you to prioritize the layer / bring it closer to the 'top' of the layers). Also, if there is something not available here, you can use the keyboard command [CTRL][SHIFT]~ to edit the CSS of the item.
When you click on an image element, you can reposition/move it, and also resize it using the resize handle at the bottom right of the text block. The movement and resizing scale will use the aforementioned Grid Size setting. By holding down the Shift key during resize, the aspect ratio of the image will be preserved. If you have added the image for a user (which is the placeholder for a user’s actual avatar), resizing the image will always maintain the aspect ratio.
There are a handful of images available to add to your certificate, but you can add in your own images to select from by uploading images into your files area. Go to System > Files > File Manager, then browse to the /_images/cert_images/ folder. Any images you upload here will be available to choose from the certificate editor.
Change Background Image
You can change the border image by clicking the Background button. This will bring up a screen where you can choose the border/background you would like to use on your Certificate.
There are a handful of images already prepared to add to your certificate, but you can add in your own images to select from by uploading images into your files area. Go to System > Files > File Manager, then browse to the /_images/cert_borders/ folder. Any images you upload here will be available to choose from the certificate editor.