Internal Messaging in Axis LMS
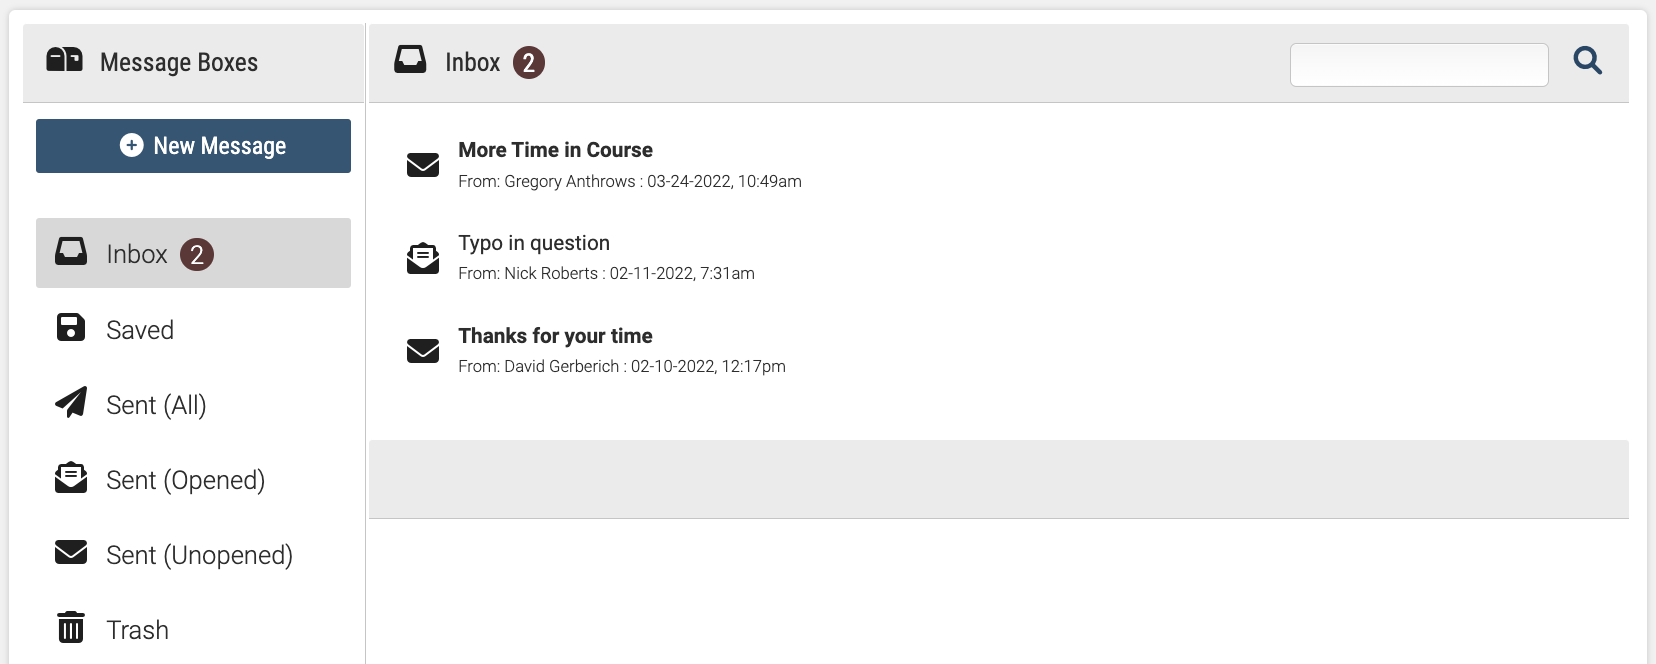
Email is a great way for reaching out to entities outside your LMS, but once your users are logged into the system, you want to keep them there - not send them back to their email client. The most effective way to communicate with users already in the system is by sending internal Messages. Messages are exclusively accessible to just you and your Active users; and unlike traditional email services, there is no risk of Messages being flagged, or marked as undeliverable in any way.
Emails versus Messages
Many of the LMS’s functions which are capable of sending emails, are also able to send messages to your users; so it falls to the admin to decide when it is best to contact a user through an email, and when it is best to send them an internal message. A good rule of thumb is that emails should be used to get users in the system, and messages should be used to give those users additional details.
| Alert | Contact | Why |
| Welcome to Course | Message | User is already in system |
| Course Completion | Message | User is already in system |
| System Expiration | User is not logged into system |
Who’s Online?

Messaging is commonly used as a means of communication between users, or as an artificial helpdesk; allowing users to contact the administrator. One of the advantages of messaging is that you’re able to restrict this to one of three different levels:
User-to-User - This is the default setting of all Axis Systems, and allows users to send messages to both the Admin, and any users they share a course or usergroup with.
User-to-Admin - This option prevents users from sending messages to each other, but preserves User/Admin messaging capabilities.
No Messaging - This option prevents users from sending any messages; the Admin and the system are still able to send users messages.
To give your users access to messages, you will want to verify that it is included in either your menu or displayed on your portal as a widget.
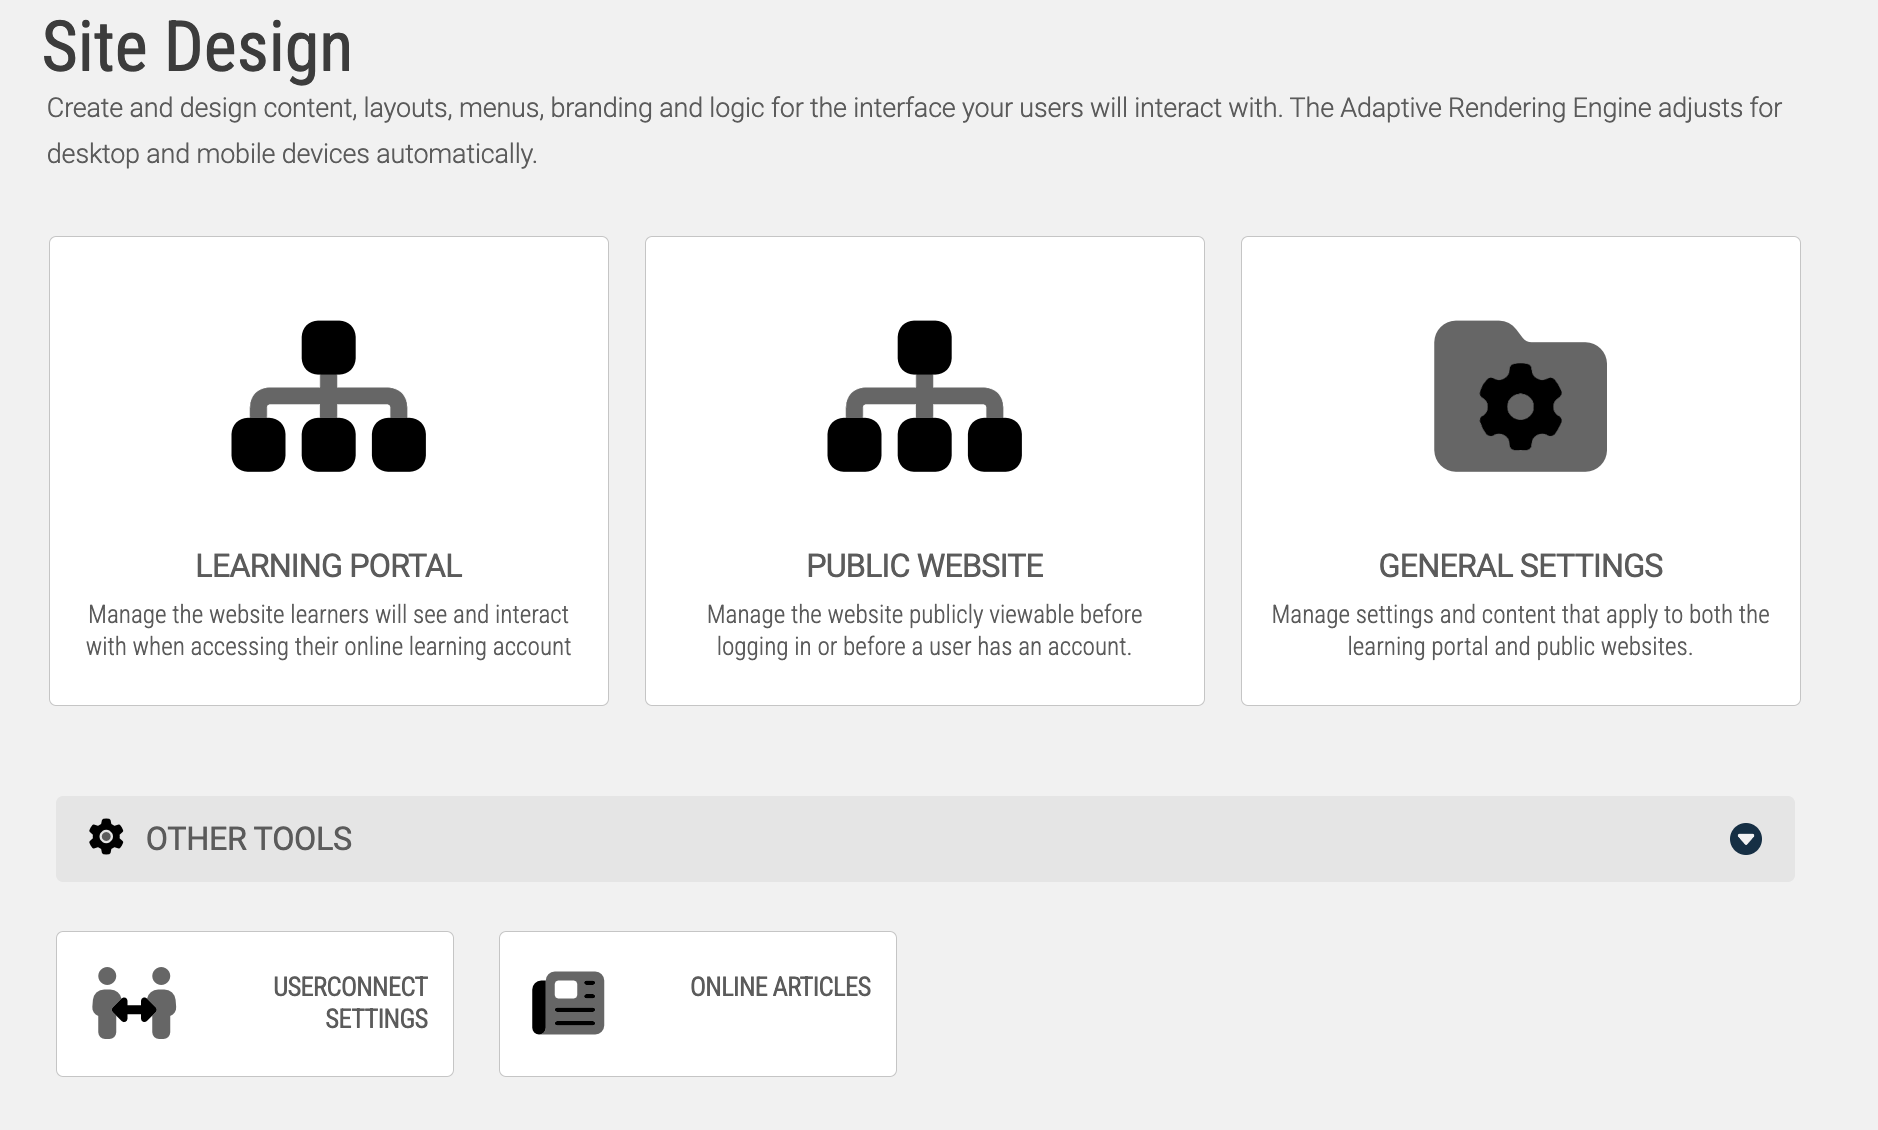
To check the menu, go to the System tab then choose Site Design. Open the Learning Portal Website then Edit Learning Portal Settings. Scroll down to the Menu Builder section, and expand it. This area is built of Top Level Menus, and Menu Items. Menu Items are unique to each Top Level Menu.
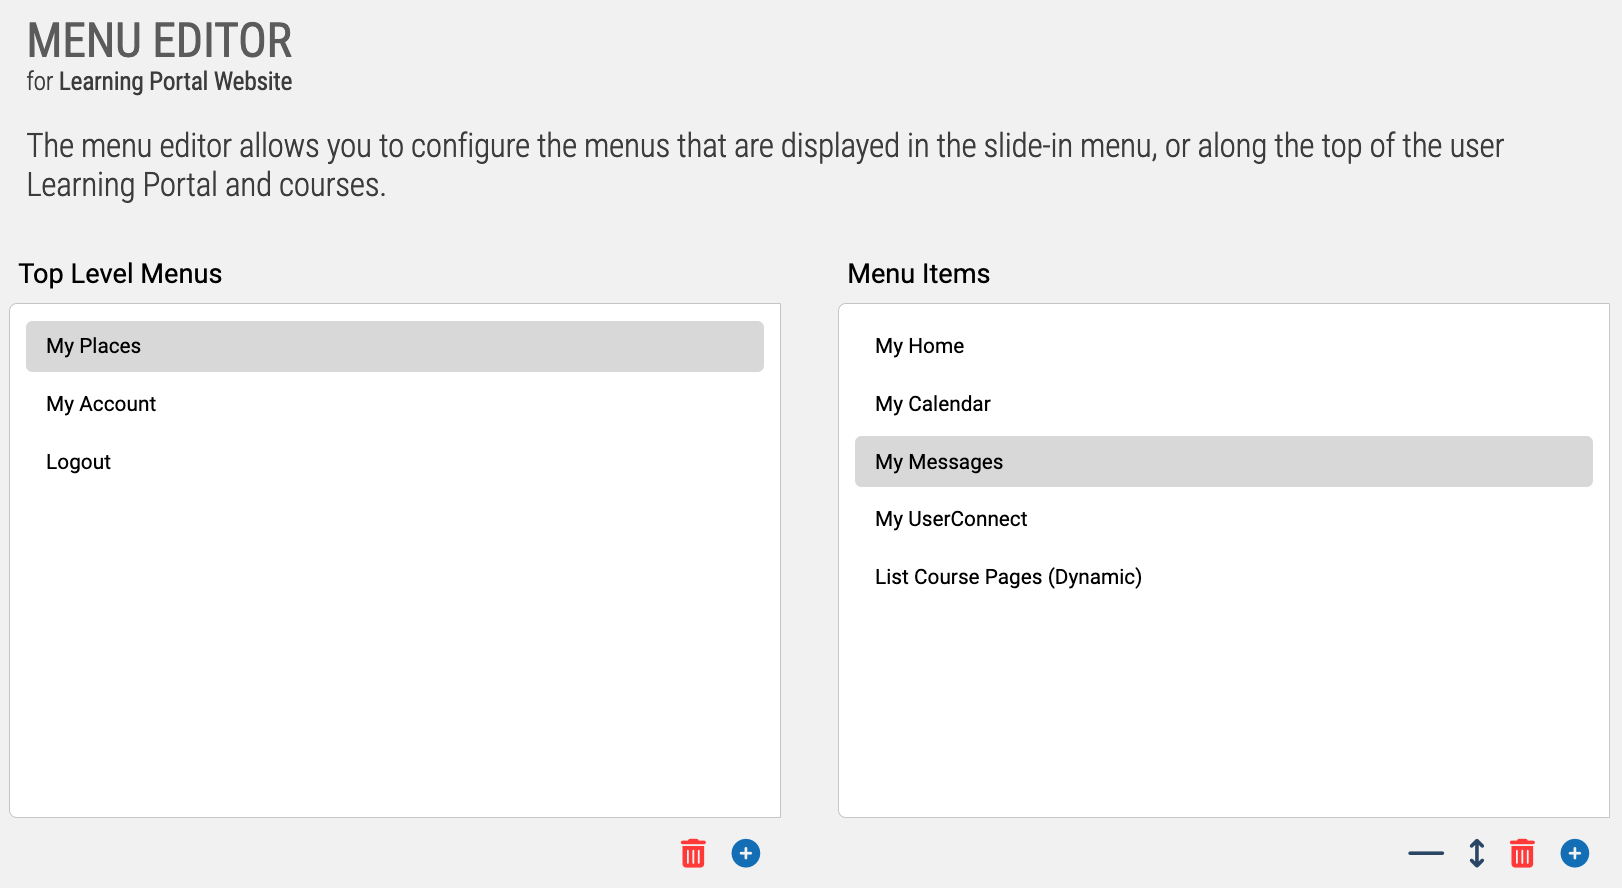
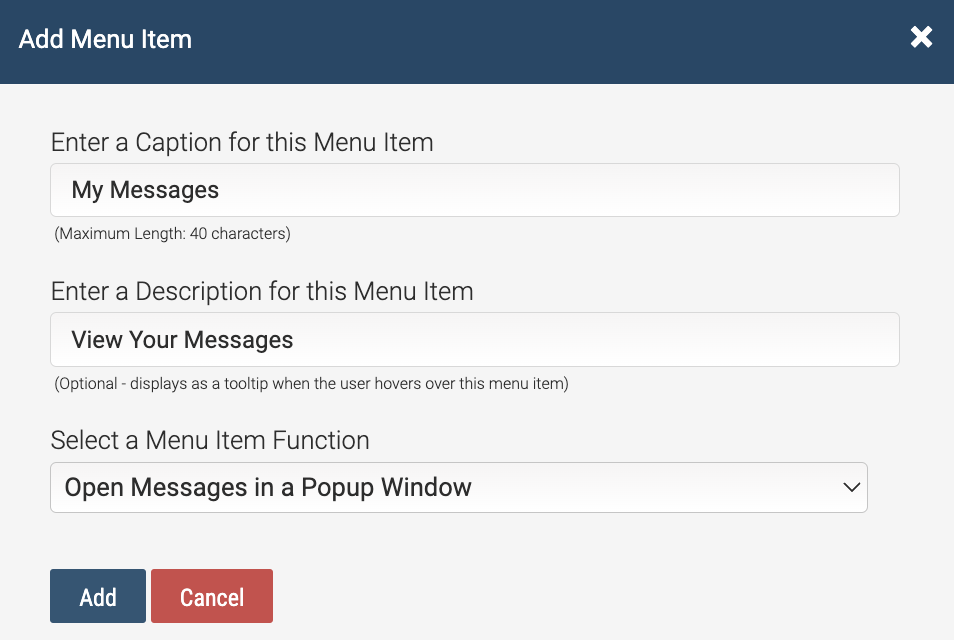
Click on each of the Top Level Menus, then scroll through their Menu Items - keep an eye out for My Messages. If you don't see it, you can add it by clicking on the green + below the Menu Items, and filling out the short form you are prompted with. If you want to remove the Messages, highlight it in the Menu Items list, then click on the red X.
User-to-Admin - This option prevents users from sending messages to each other, but preserves User/Admin messaging capabilities.
No Messaging - This option prevents users from sending any messages; the Admin and the system are still able to send users messages.
Some administrators may also choose to receive a notification email when they (the administrator) receives a message. This setting, as well as changing who your users may message can be changed by submitting a support ticket.
Integrating MessagingTo give your users access to messages, you will want to verify that it is included in either your menu or displayed on your portal as a widget.
To check the menu, go to the System tab then choose Site Design. Open the Learning Portal Website then Edit Learning Portal Settings. Scroll down to the Menu Builder section, and expand it. This area is built of Top Level Menus, and Menu Items. Menu Items are unique to each Top Level Menu.
Click on each of the Top Level Menus, then scroll through their Menu Items - keep an eye out for My Messages. If you don't see it, you can add it by clicking on the green + below the Menu Items, and filling out the short form you are prompted with. If you want to remove the Messages, highlight it in the Menu Items list, then click on the red X.
You can also choose to add messages via the Messages Widget. To add the widget, go to the Learning Portal Listing, then edit a page. Click on the Add Widget button near the top right of the page then expand the Messages. Click on the Add Messages Listing to add the widget to the page. Once the widget is on the page, you can adjust its size and choose whether or not to give it a border.