Admin Handbook - Users

There are a lot of actions an administrator can take upon any user record. This quick guides aims to get you to the user you're looking for quickly, and guide you through whatever actions you need to.
Finding a User Record
Before you can work with a user, you need to select a user to work with. To start, go to your Users tab, and narrow your search by one of the following (in order of uniqueness).
- Login Name
- Email Address
- First / Last Names
- Custom Fields
While searching for users, you can choose to search against a specific field by prefixing your search with the field name, such as "FIRSTNAME:Jaclyn" or "CITY:Sunnyvale" - just remember that there should be NO SPACE between the colon (:) and what you’re searching for.

Once you’ve found the user you were searching for, we’ve tried to categorize the actions you may want to take:
- Work with this User’s Profile
- Work with this User’s Password
- Work with this User’s Courses
- Work with this User’s Hierarchy
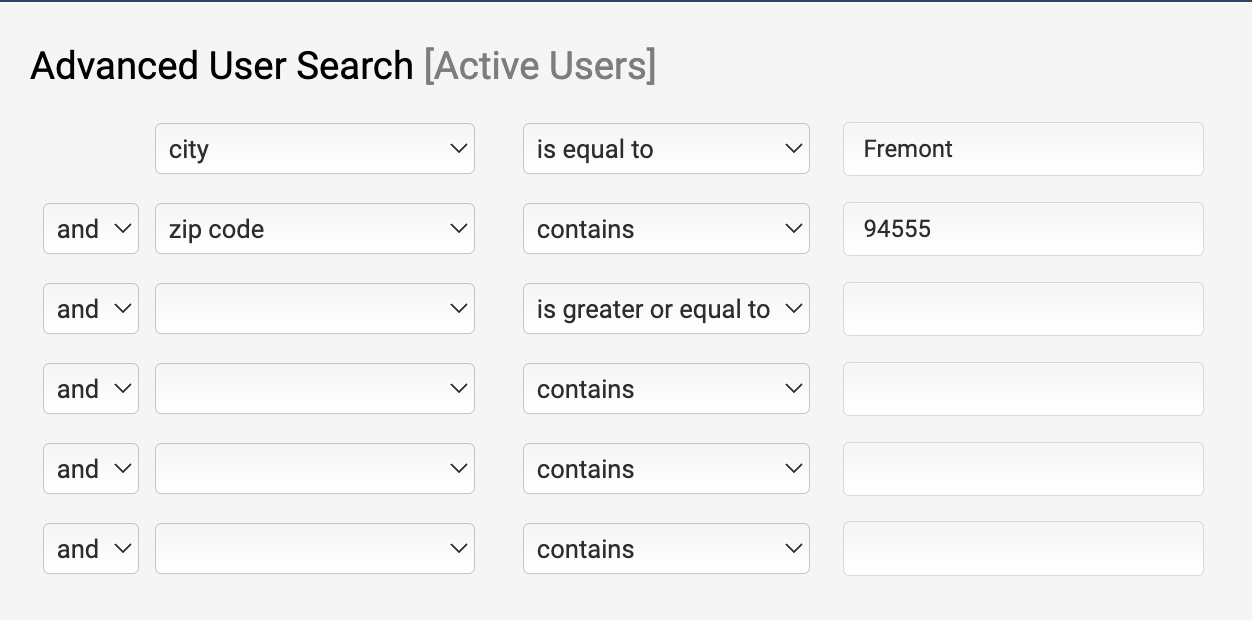
You can also do Advanced Searches by clicking the Gear icon next to the search bar. With advanced searches, you can search across multiple fields. These searches can also be And / Or searches.
User Profile
After finding your user, selecting the "User Profile" tile will bring you to that user's General Info tab.
- This is the user’s login name. When they go to log in (see example below), they will enter this into the Login ID field
In this image, this user's login name is "42315" - General Info - these are the fields that standardized across most companies.
These are the fields you see in this image - Custom Fields - these are the fields that can be edited and pre-populated for company-specific needs.
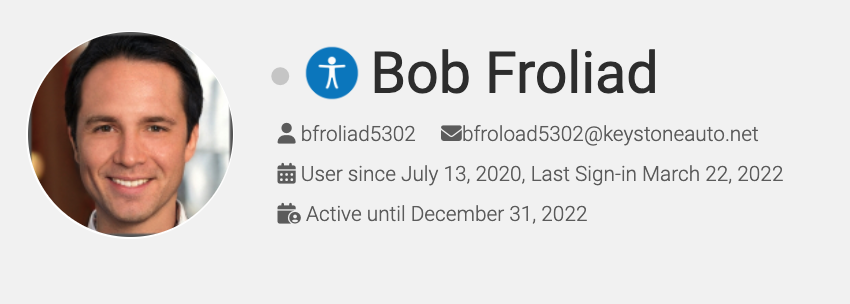
You can see an example below. - User Image - this is mostly to be able to quickly identify a user; but is also how this user is represented on User Connect
- System Active Dates - these dates represent the timeline where this user’s account is Active, and the user is able to log into your Axis system.
In this image, this user is able to log into the system for the duration of 2018. - Simulate Login - If for some reason you need to log in as this user, just click the key icon (only applicable to Active Users)
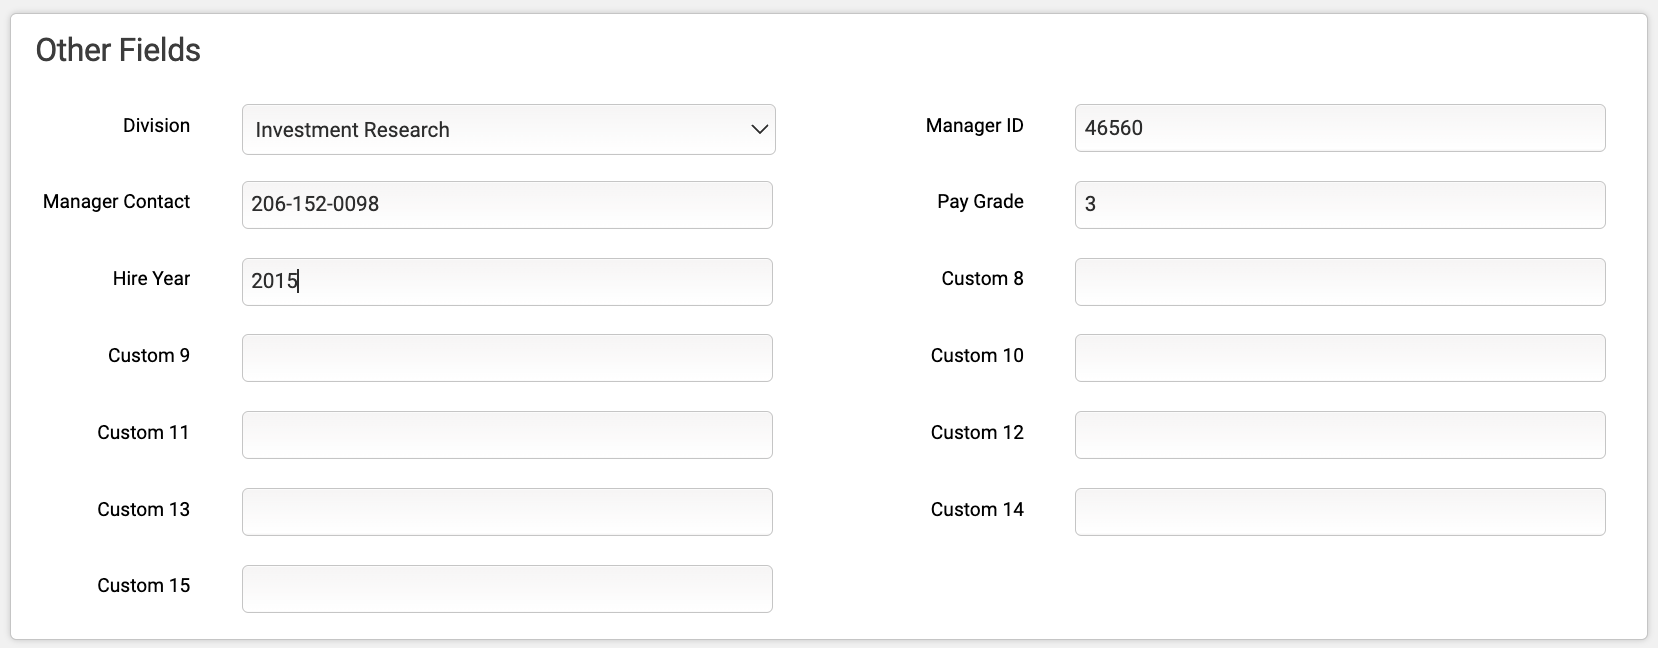
- In this system, the first 5 fields have been renamed. Both "
User Passwords
In an effort to make user data as secure as possible, user passwords are not visible unless their password is currently set to a Temporary Password. However, the administrator does not need to know a user's current password to be able to log in or reset a password for their users.
As long as it has not been hidden from view, your users can always recover their password from the User Login Page.
Log in as User
After locating the user (see above), click the key icon.
Reset Password
After locating the user (see above), click the "Password Reset" icon.
User Courses
In order to access a Course, a user must be both enrolled into the Course, and be within their Course Active Dates. You may also wish to manually reset and archive a User's Course attempt, or re-allow access to a quiz the user has lost access to.
In order to access a Course, a user must be both enrolled into the Course, and be within their Course Active Dates. You may also wish to manually reset and archive a User's Course attempt, or re-allow access to a quiz the user has lost access to.
Enrollment and Active Dates
There are many ways to give your user access to a Course, but to check that they're actually enrolled in the Course, locate the User, the select their Manage Courses Tile.
This will pull up a list of all the Courses this user is currently enrolled in (if any). To enroll the user into more Courses, click the Green addition symbol.
The user's Course Active Dates can be assigned while enrolling the user in this method, or edited after Enrollment by selecting "Edit Dates".
Resets and Archives
Resetting a Course for a User eliminates all of the existing progress and scores for the Course. It's not something to be taken lightly, as it cannot be undone. After selecting the user that needs to have a Course reset, select the "Reset User" icon, then select which Courses to reset.
Remember, this cannot be undone!
After a Course has been reset for a user, the basic information about that reset can continue to be found under the user's Archived Reports.
Re-allow Quiz Access
If a user has lost access to a Graded Quiz, they may have met the maximum completion attempts for the Quiz, or have abandoned the quiz while on high-stakes mode. In either case, you can check (and re-allow access) by finding the Quiz from your Manage Learning Objects area.
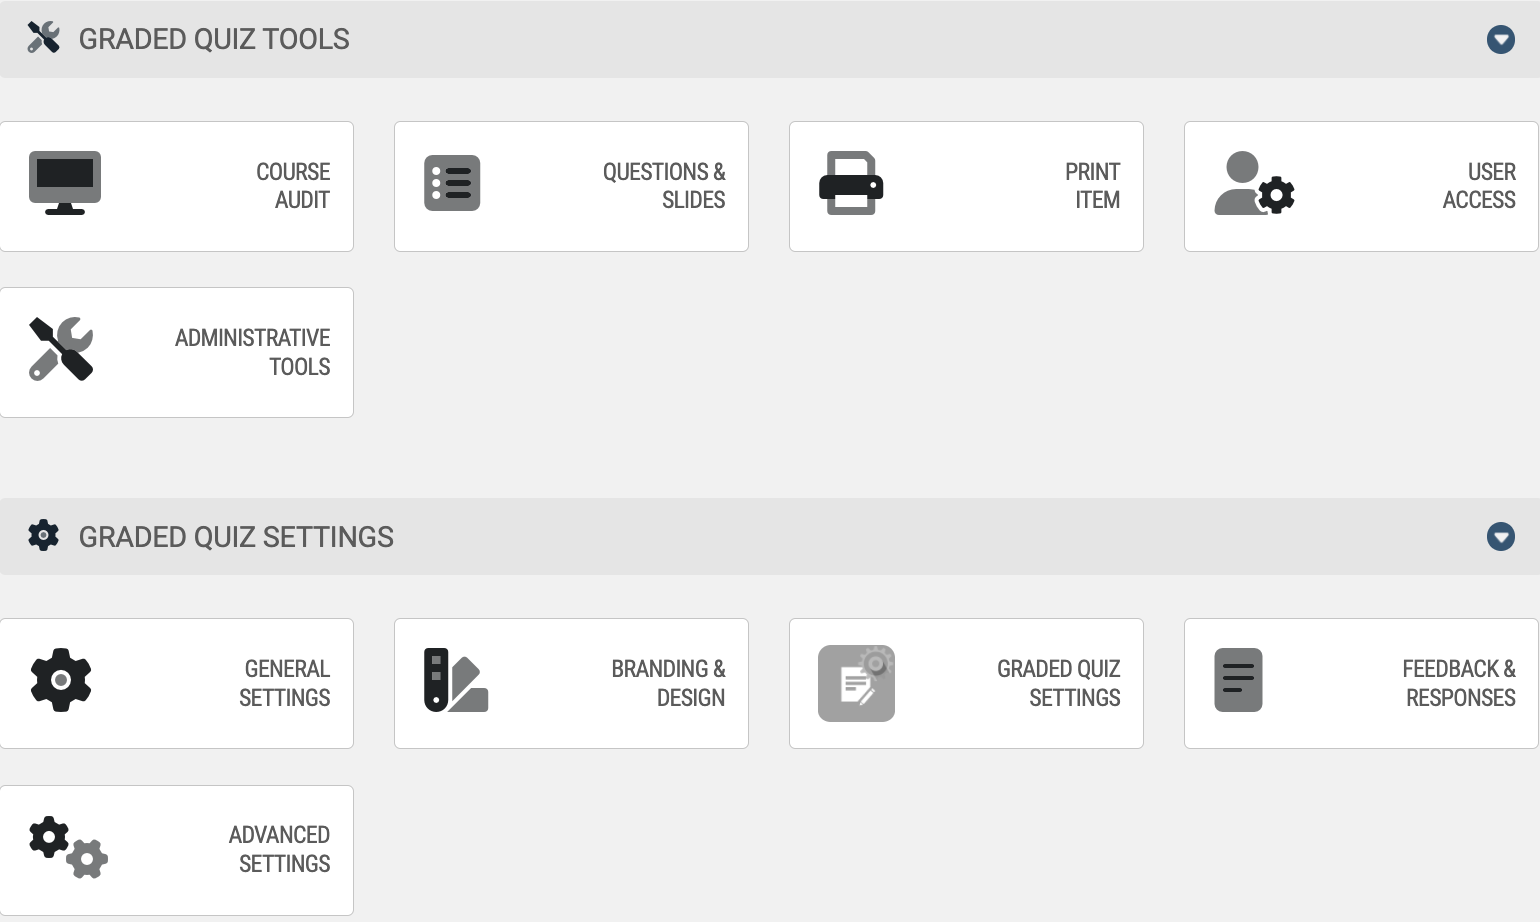
Unlike other user actions, this is done on a quiz-by-quiz basis, so you will need to find the Quiz in your Learning Objects area, then select the Graded Quiz's User Access tile.
User Hierarchy
By default, all users are created in the system with a 'Learner' role. If your system is using Managers, a user's role can be changed to that of a Manager, then put in charge of one or more users.
If Manager functionality is enabled on your system, you can work with their Role and Hierarchy by selecting the user from the Manage User's page, then clicking on their "Role & Topology" tile.

Identifying a User's Role
The user's role can be identified by going to the "Role" tab, after accessing their Role & Topology. By default, all users exist as learners and report to the administrator.
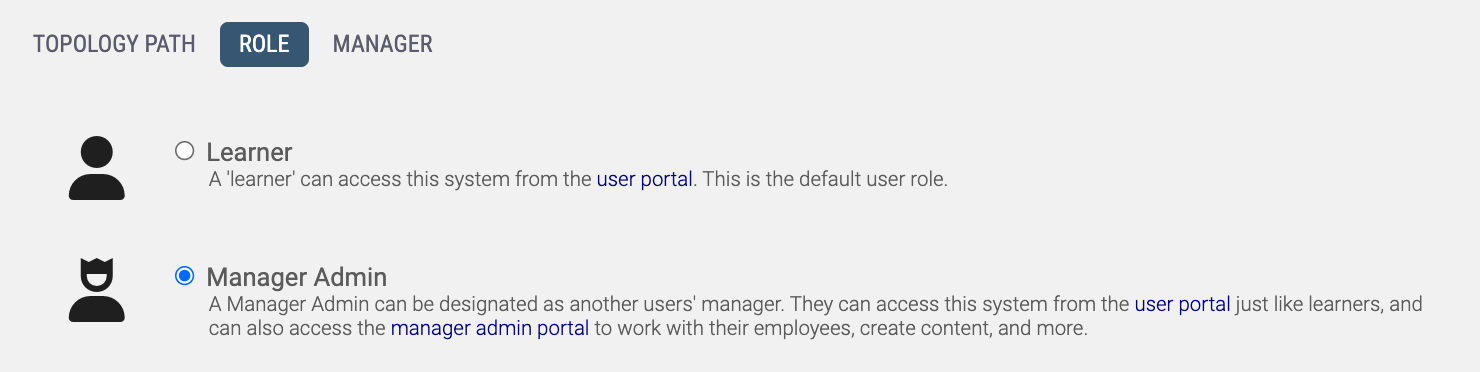
If a user's role is changed to that of a Manager, they can then have other users (both 'Learners' and other 'Managers') report to them to create a hierarchy tree.
The User's Manager
The user's Manager can be identified by going to the "Topology Path" tab, after accessing their Role & Topology. By default, all users exist as learners and report to the administrator.
- If a user has no users above them, in the graph, they are reporting directly to the Administrator.
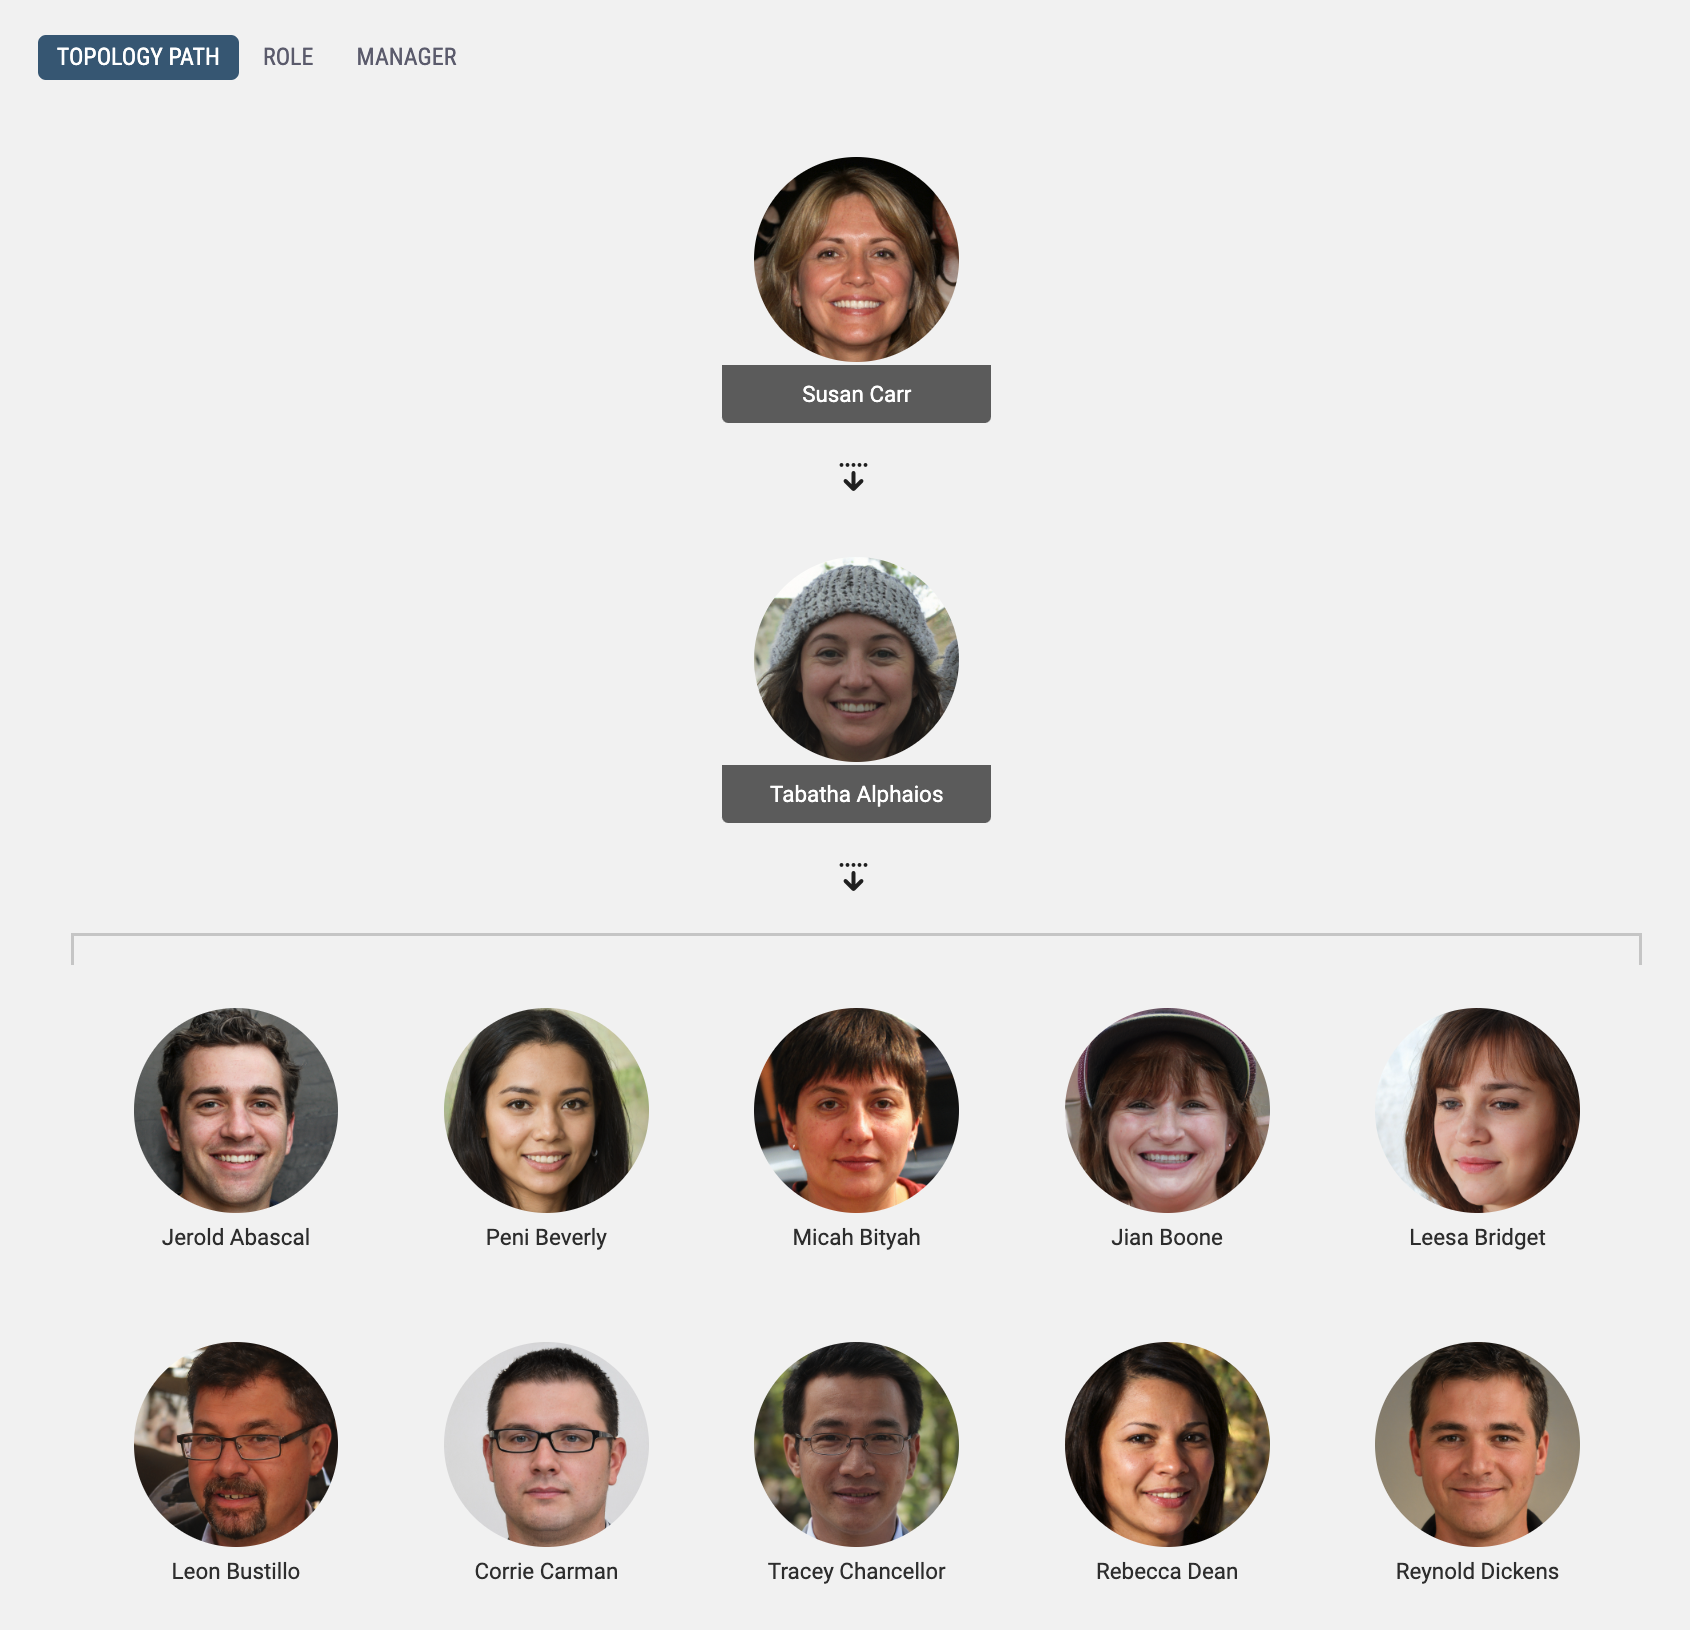
- If the user has one or more users above them, the selected user reports to the profile directly above their own.
By selecting "None", this user would instead report directly to the Administrator.

Micromanaging Manager Tools
If a user's role is set to that of a Manager, you will see an additional icon on their user dashboard, after selecting them from the Manage Users page named "Manager Permissions". Clicking on this tile will allow you to dictate what admin-capabilities this Manager has over the users they manage.
Just toggle the tools they need, and save your changes.