Automating your LMS

The ultimate goal of many admins is to reach the pinnacle point where they can be completely hands off, allowing their LMS to automate both the user life cycle, and all of their administrative necessities; such as reporting. While this may be more or less attainable depending on your business model, by utilizing the many different tools within Axis, you may never need to log in as an administrator again.
Automating the User’s Life Cycle
The User’s Life Cycle, in its simplest iteration, is composed of three components:
- Bring the user into the system as a User
- Complete their Courses
- Get them out of the System
Step One: Getting a User into the System
The first decision you’ll want to make as an admin is to decide how users are going to get into your system. There are two user-driven methods of bringing users in included within Axis: Open Enrollment, and Purchase.
Open Enrollment
Users can enroll into your course, free of charge. Using Event Triggers and Section Settings, you can optionally charge for access to different portions of the course; but enrollment is free.
Purchase
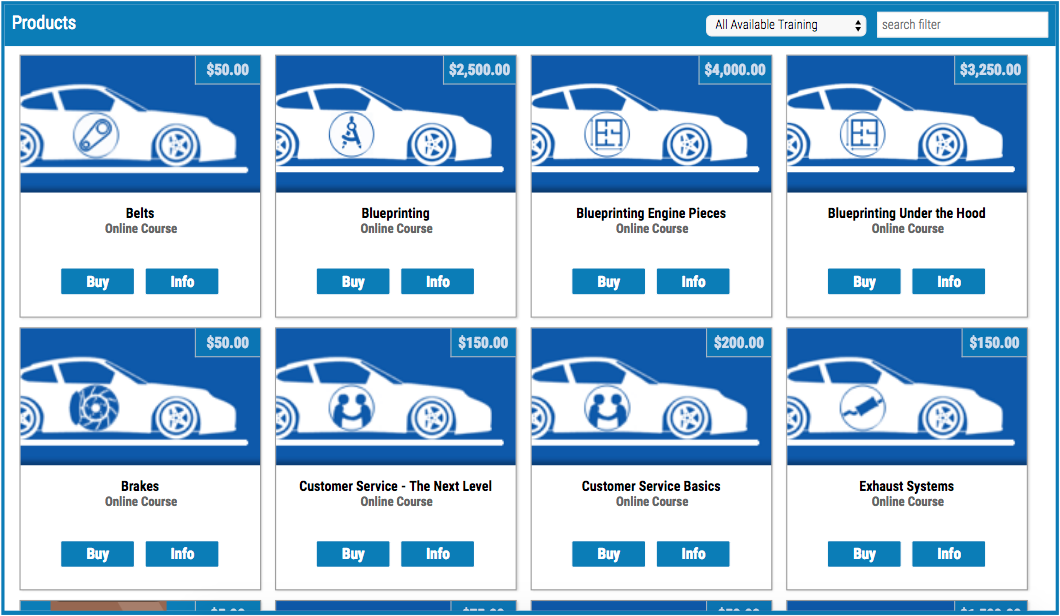
Users purchase to access your content. Using "Other Products", you can allow users to purchase "Course Bundles".
Regardless of which method you choose to go with, an extremely important field to fill out is the Course Duration [Learning > Online Courses > Manage Courses > Manage > Settings > Enrollment Duration] OR [Learning > Online Courses > Manage Courses > Manage > E-Commerce Settings > Course Duration].
Regardless of which method you choose to go with, an extremely important field to fill out is the Course Duration [Learning > Online Courses > Manage Courses > Manage > Settings > Enrollment Duration] OR [Learning > Online Courses > Manage Courses > Manage > E-Commerce Settings > Course Duration].
By ensuring that this field is set, you are protecting yourself from giving unlimited access to a Course and (more importantly), setting up the ability to get users out of the system.
Open Enrollment
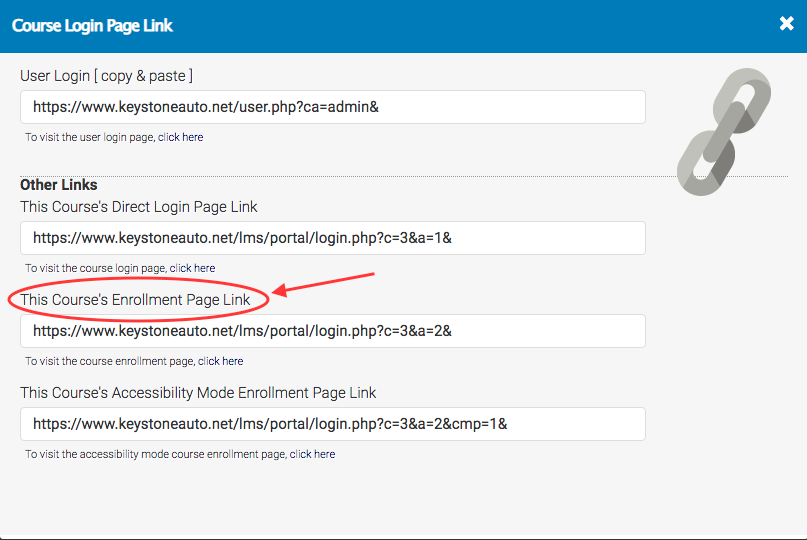
If you’ve chosen to go with Open Enrollment, you are again presented with options - this time how your users are going to enroll. Without any additional know-how required, any admin can use Course Listing Widgets on their Public Website; and for admins who choose not to use their Publuc Website, Enrollment Links can be generated for the Course to distribute how you see fit. [Learning > Online Courses > Manage Courses > Manage > User Links > Enrollment Page link].
For those choosing to sell their courses, you are faced with a similar decision - sell via your Public Website, or distribute the links depending on what fits your business best. Add-to-Cart links can be generated in the Shopping Cart [E-Commerce > Shopping Cart > View Shopping Cart Links > View Course Links > {Magnifying Glass} > Public Website: Add to Cart Link]
Purchase
For those choosing to sell their courses, you are faced with a similar decision - sell via your Public Website, or distribute the links depending on what fits your business best. Add-to-Cart links can be generated in the Shopping Cart [E-Commerce > Shopping Cart > View Shopping Cart Links > View Course Links > {Magnifying Glass} > Public Website: Add to Cart Link]
Step Two: Have your Users Complete Their Courses
This step can be as simple or as elaborate as you need. If you only need to deliver content to your users, this can be the quickest step. But if you’re keen to the idea of gradually unlocking a Course to your users - if you want to sell certain sections of courses, or if you want to bridge one course into another; this step may take a small investment of time and planning.
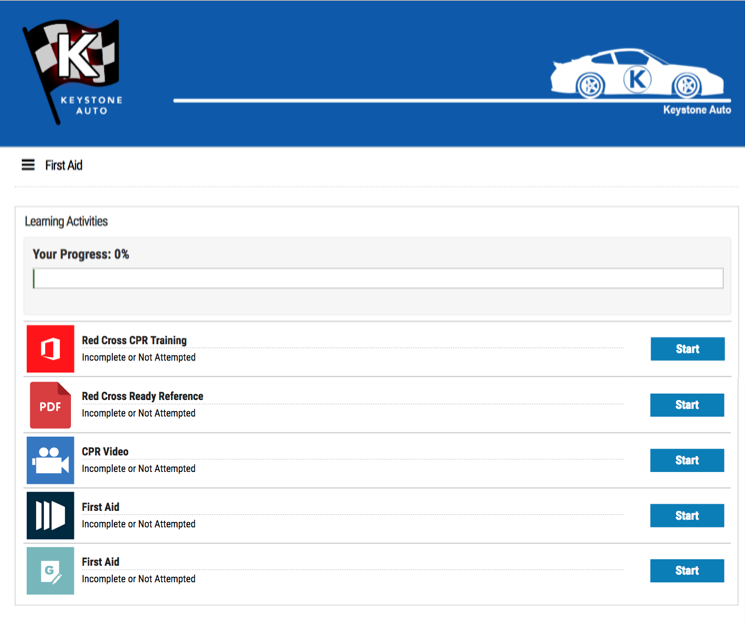
We’ll start with the simplest plan: strictly delivering content to your users. To do this, open up your Online Learning Objects area, and add your Modules into the Course. [Learning > Online Courses > Manage Courses > Manage > Course Content > {Drag and Drop your Content in, Create New Content, or Browse for Previously Made Content} > Add > Submit Changes].
We’ll start with the simplest plan: strictly delivering content to your users. To do this, open up your Online Learning Objects area, and add your Modules into the Course. [Learning > Online Courses > Manage Courses > Manage > Course Content > {Drag and Drop your Content in, Create New Content, or Browse for Previously Made Content} > Add > Submit Changes].
- After a User completes this module, what should they be able to see / do?
- What if they fail?
- What if they pass?
- Is this section exclusive to certain users?
- A user has completed this course; what do they do now?
Event Triggers
Events fired off based on user actions.
When a user from the user group Shift Managers completes Manager Certification (module), enroll them into Manager Compliance (course).
When a user from the user group Shift Managers completes Manager Certification (module), enroll them into Manager Compliance (course).
[Learning > Online Courses > Manage Courses > Manage > Event Triggers > New Event Trigger]
Section Settings: Choose whether or not this section should be accessible on a user-by-user basis.
Subsection Settings: Require content within this area to be taken or passed in a certain order.
This step can have an incredible amount of diversity, and most of that flexibility stems from those three tools; the links below will take you through completing several different scenarios that you may consider implementing during this step:
- Scheduled Course Resets
- Free Enrollment; Paid Certification
- Courses with a Time Requirement
Step Three: Completing the User's Life Cycle
This step treads slightly on the toes of Step One, especially if you are selling your courses. Using the "Other Products" within your Shopping cart, an admin has the ability to extend a user's Active Dates within the System, as well as enroll a user into a Course for a set duration. Using these tools, instead of selling a course directly (as mentioned in Step One), an admin would do well to sell using these "Other Products".
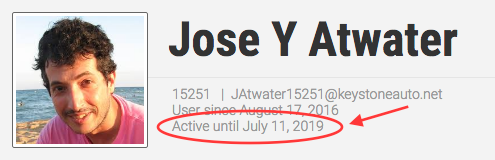
When a user purchases this product, they will be enrolled into a Course for a unique duration of time (separate from the E-Commerce Course Duration), as well as extending (or setting) the user's System Active Dates. When the user approaches the conclusion of their system active dates, they will automatically be de-activated from the system.
Specialized User Profiles
Depending on the audience size that your system draws in, you may be fortunate enough to deliver content that appeals and draws in a demographic that includes multi-lingual users and/or users who need content delivered in a 508 compliant method. If you find your system is attracting these users, you would ordinarily need to manually set either their language, or turn on Accessibility mode.
However, there are specialized widgets and links that exist which will automatically set these fields upon user creation, alleviating the administrative work from you.
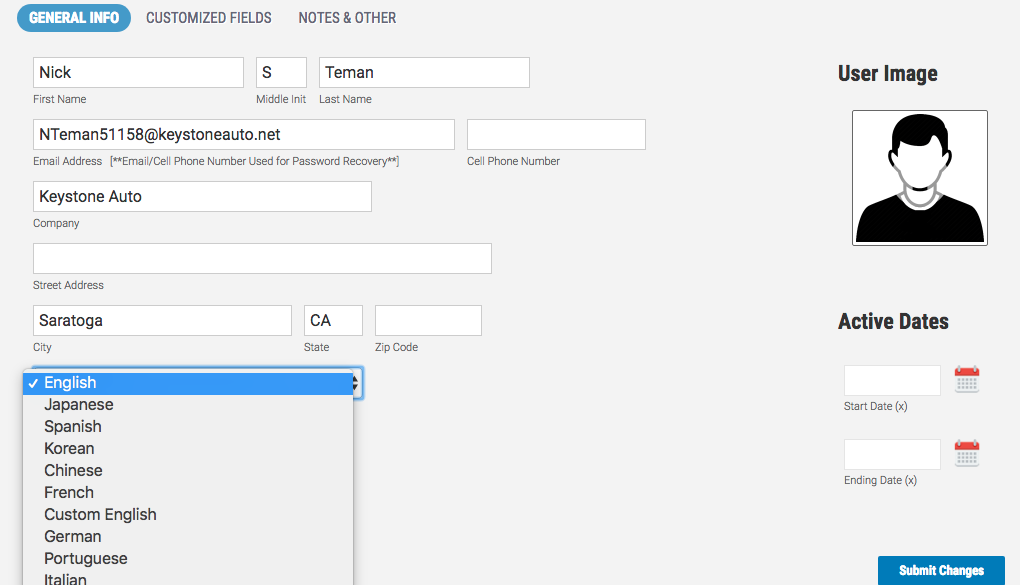
To set 508 compliance upon user creation, distribute the Accessibility mode enrollment link [Learning > Online Courses > Manage Courses > Manage > User Links > This Course’s Accessibility Mode Enrollment Link].
To set a localization for a user upon creating, add a New User Sign Up widget to an Public Website page, then edit its settings to set which language a user should be set to when signing up through this widget.
Partition Managers
There are some tasks that will never be able to be done automatically, however, that doesn’t mean it has to fall to the admin to complete. Using a concept referred to as ‘Partition Managers', the admin can create managers within their system to perform different tasks such as creating questions.
To create a manager whose sole purpose is to enter slides, you’ll want to create a Manager [Users > Add User > Next > Role & Topology > Role: Manager]. After the Manager is created, return to that user’s Dashboard to open up their Manager Permissions. Toggle off all of the radio buttons but the ability to Create Question Slides.
Now when this manager logs in [System Links > Manager Login], they’ll be able to create and edit their own slides, which can then be used by the admin throughout the system.
You can extend these responsibilities using other radio buttons, allowing them to create Learning Objects, and even Courses for you.
Selling in Bulk
In addition to selling to users directly, you may also be in the market of selling in bulk. If you find yourself in this situation, an invaluable tool to you will be the Keycode Manager, and Agents. By utilizing these tools, you can focus less on B2C, and concentrate more on B2B sales - while not directly related to automating your LMS, this can be a huge asset to your marketing team.
This step treads slightly on the toes of Step One, especially if you are selling your courses. Using the "Other Products" within your Shopping cart, an admin has the ability to extend a user's Active Dates within the System, as well as enroll a user into a Course for a set duration. Using these tools, instead of selling a course directly (as mentioned in Step One), an admin would do well to sell using these "Other Products".
When a user purchases this product, they will be enrolled into a Course for a unique duration of time (separate from the E-Commerce Course Duration), as well as extending (or setting) the user's System Active Dates. When the user approaches the conclusion of their system active dates, they will automatically be de-activated from the system.
Automating Administrative Tasks
Administrative tasks, and which ones you should consider utilizing, will once again depend on your business model. If you need to deliver reports to a third party, you may consider creating a report admin; if you’d like to hand off management of different pieces of the system, you may opt to create several managers.Specialized User Profiles
Depending on the audience size that your system draws in, you may be fortunate enough to deliver content that appeals and draws in a demographic that includes multi-lingual users and/or users who need content delivered in a 508 compliant method. If you find your system is attracting these users, you would ordinarily need to manually set either their language, or turn on Accessibility mode.
However, there are specialized widgets and links that exist which will automatically set these fields upon user creation, alleviating the administrative work from you.
To set 508 compliance upon user creation, distribute the Accessibility mode enrollment link [Learning > Online Courses > Manage Courses > Manage > User Links > This Course’s Accessibility Mode Enrollment Link].
To set a localization for a user upon creating, add a New User Sign Up widget to an Public Website page, then edit its settings to set which language a user should be set to when signing up through this widget.
Partition Managers
There are some tasks that will never be able to be done automatically, however, that doesn’t mean it has to fall to the admin to complete. Using a concept referred to as ‘Partition Managers', the admin can create managers within their system to perform different tasks such as creating questions.
To create a manager whose sole purpose is to enter slides, you’ll want to create a Manager [Users > Add User > Next > Role & Topology > Role: Manager]. After the Manager is created, return to that user’s Dashboard to open up their Manager Permissions. Toggle off all of the radio buttons but the ability to Create Question Slides.
Now when this manager logs in [System Links > Manager Login], they’ll be able to create and edit their own slides, which can then be used by the admin throughout the system.
You can extend these responsibilities using other radio buttons, allowing them to create Learning Objects, and even Courses for you.
Selling in Bulk
In addition to selling to users directly, you may also be in the market of selling in bulk. If you find yourself in this situation, an invaluable tool to you will be the Keycode Manager, and Agents. By utilizing these tools, you can focus less on B2C, and concentrate more on B2B sales - while not directly related to automating your LMS, this can be a huge asset to your marketing team.
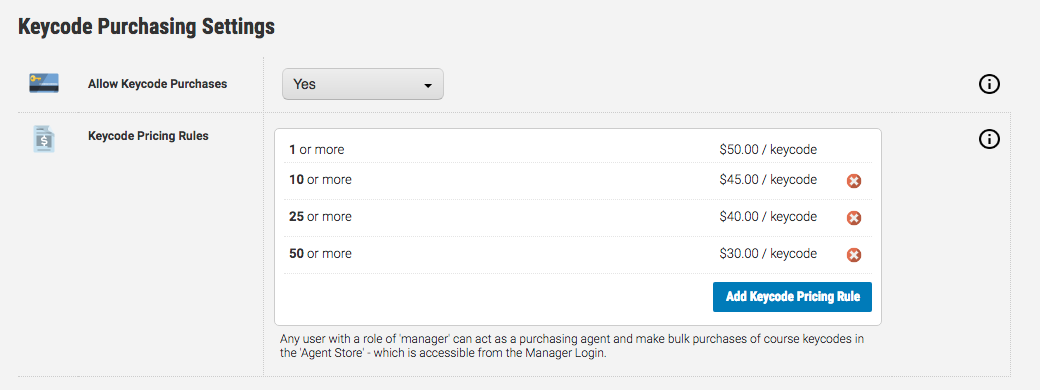
Once a manager is set up, and your shopping cart is established, your manager (referred to in this context as an "Agent") can purchase your courses in bulk to either sell or distribute as they see fit.
To utilize these tools, there are a few pieces you need to have in place:
To utilize these tools, there are a few pieces you need to have in place:
- Shopping Cart set up
- User set as a Manager
- Bulk Pricing in place
[Learning > Online Courses > Manage Courses > Manage > E-Commerce Settings] - Keycode Redemption Widget on your Learning Portal Website
Reports
Depending on your business model, you may need to deliver reporting on groups of users to different individuals. For cases such as these, you’ll want to utilize Report Admins.
This video goes into further detail of how-to; but as a quick summary, first create you’ll create a Report Admin, share course groups or courses, then share users based off of Organizational Hierarchies.
The report admin will then be able to log on whenever they'd like, to work with the reports that you've shared with them similar to what you're able to view within your Reports tab.
Another scenario you may encounter is: rather than use Reports Admins, email reports out on a regular basis. If your business is able to take advantage of this tool, Automated Reports allow you to save and send reports out to multiple email addresses, alleviating the need for them to log in, as well as allowing the reports to be viewed by multiple people if needed.
Automated Emails
Automated emails can be delivered to one of many different addresses: Users, Managers, Courses. They can be used to alert users of courses (and accounts) starting, ending, or to express concern of their averages in a course. This tool is very useful for keeping in constant contact with your users, and can be sent out on a schedule, or every day.
These can also be a strong marketing tool to retain your existing users. "your course is expiring in X days, if you need additional time, you can purchase an extension by using this link".